How to: Configure Your Camera with CMS5 PC SoftwareUpdated 4 days ago
Once you’ve added your camera to CMS5, you may want to change a few of the settings to get the most out of your new camera. Some of them may not apply to your specific camera, but this guide will help get you up and running if you’re using CMS5.
Need more support? Check out our support packages.
Entering the Device Config Menu
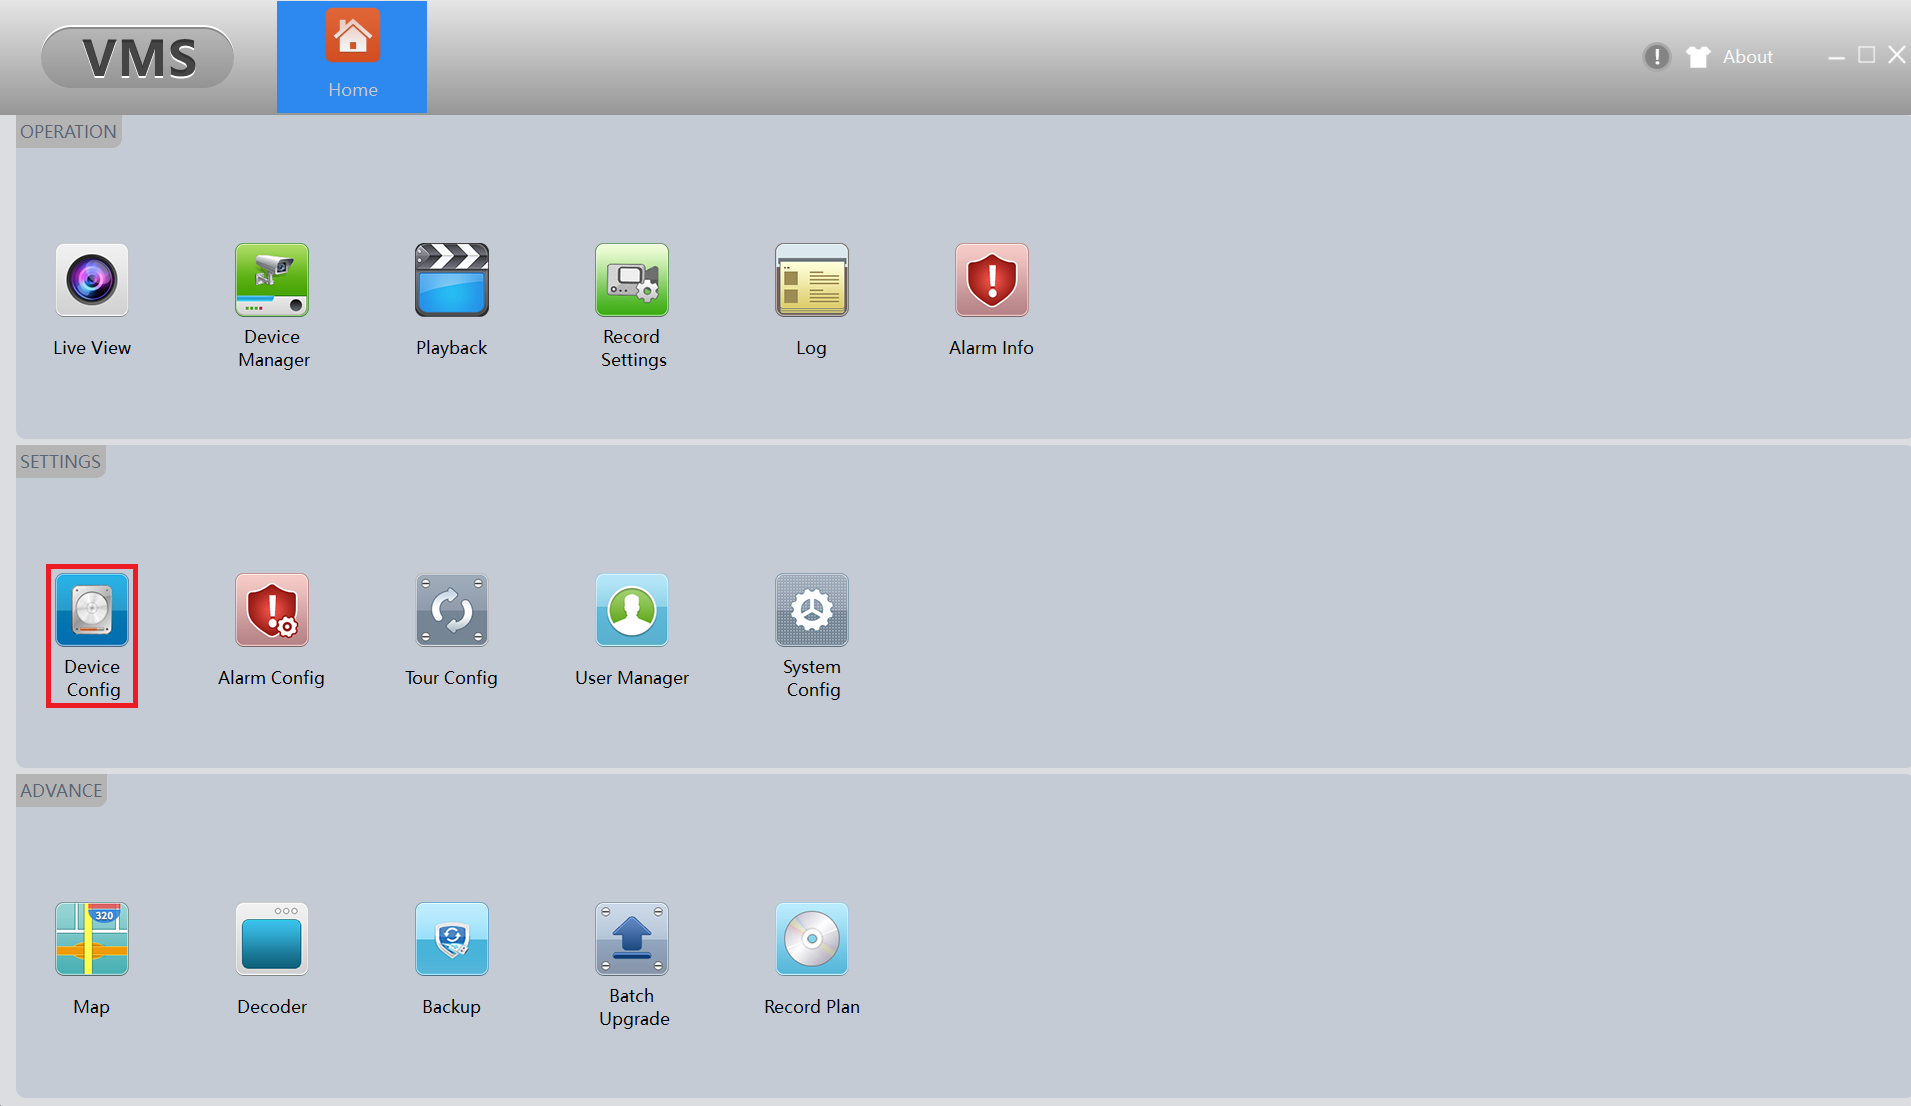
For all of the steps below, you’ll have to first enter the ‘Device Config’ menu from the main page.
You will then have to select the camera from the ‘default group’ on the left hand pane.
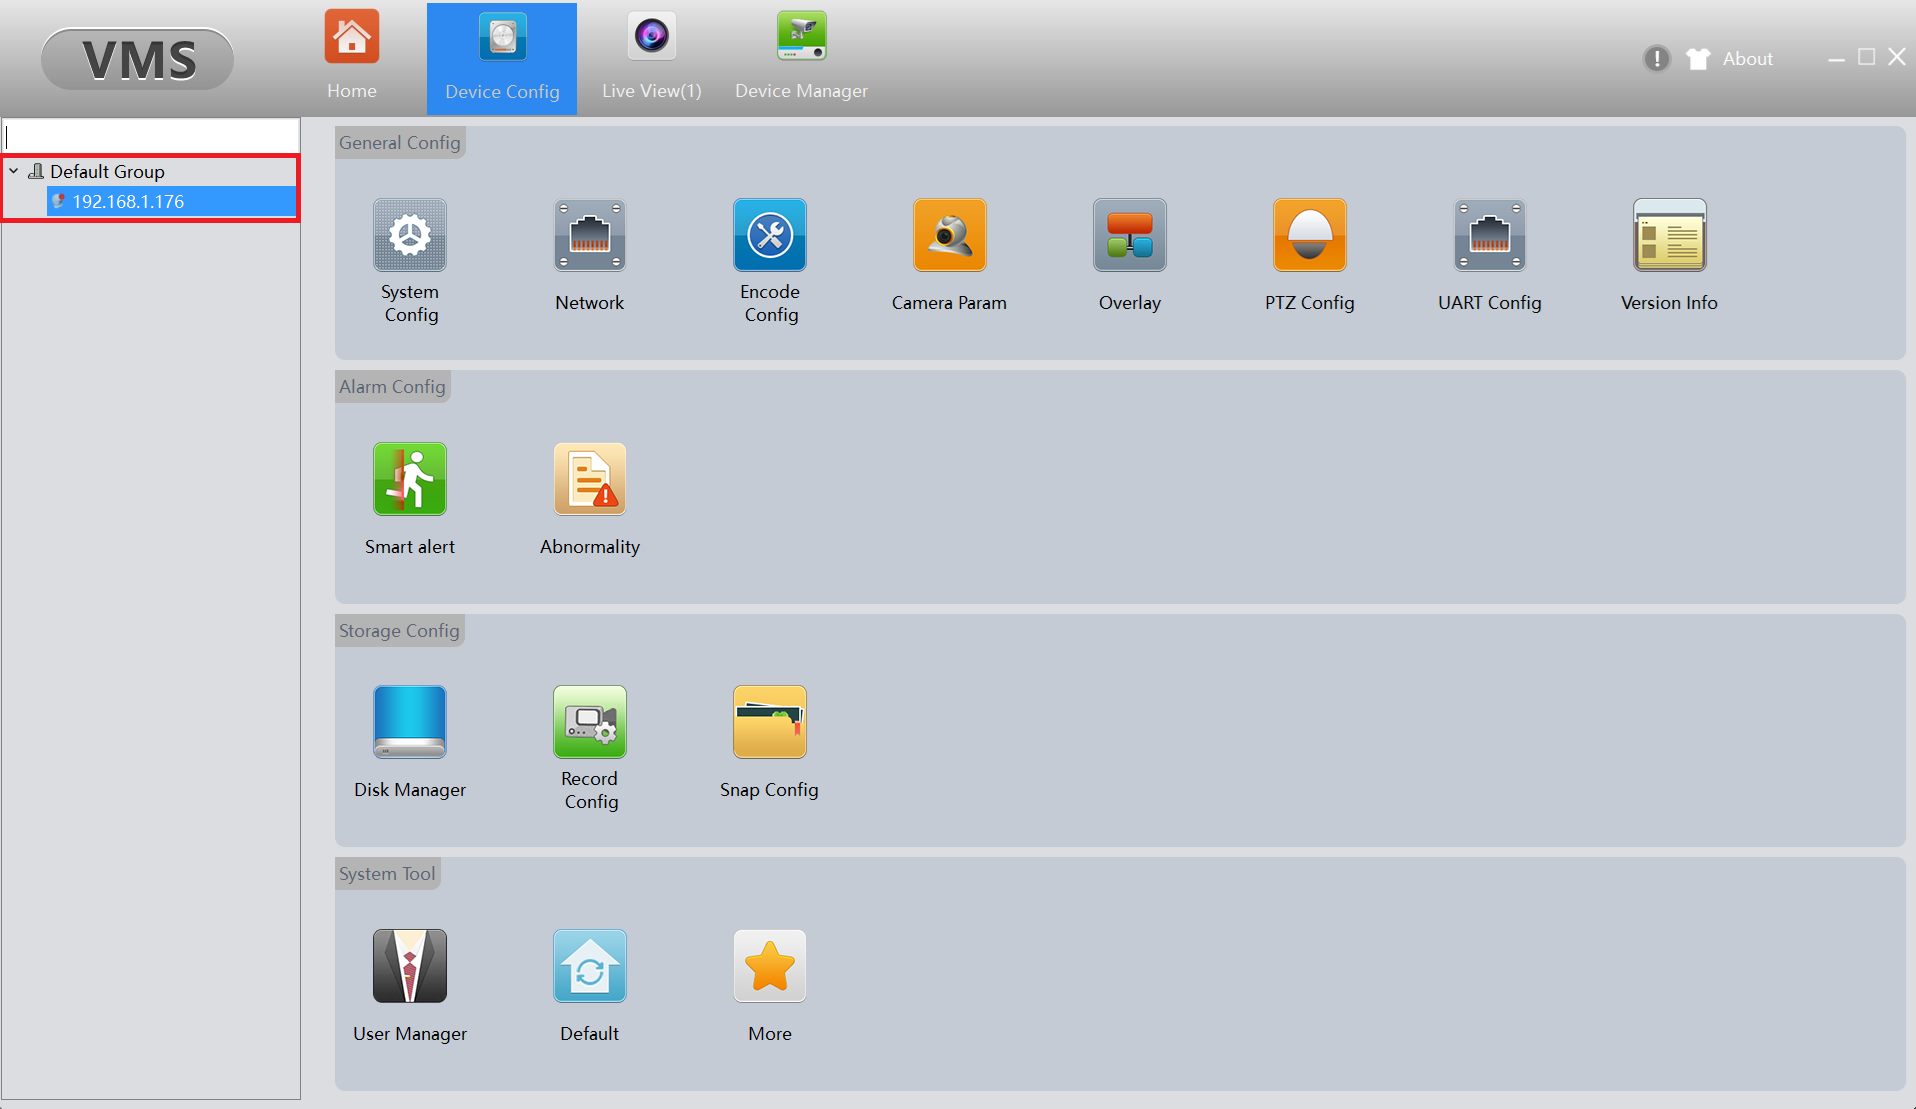
From now on, whenever we talk about navigating to the ‘Device Config’ menu, it means following these steps.
Checking SD Card
If your camera has SD card support, you can check the status of the card and format it under the ‘Disk Manager’ window under ‘Device Config’. A window like this means an SD card cannot be detected:
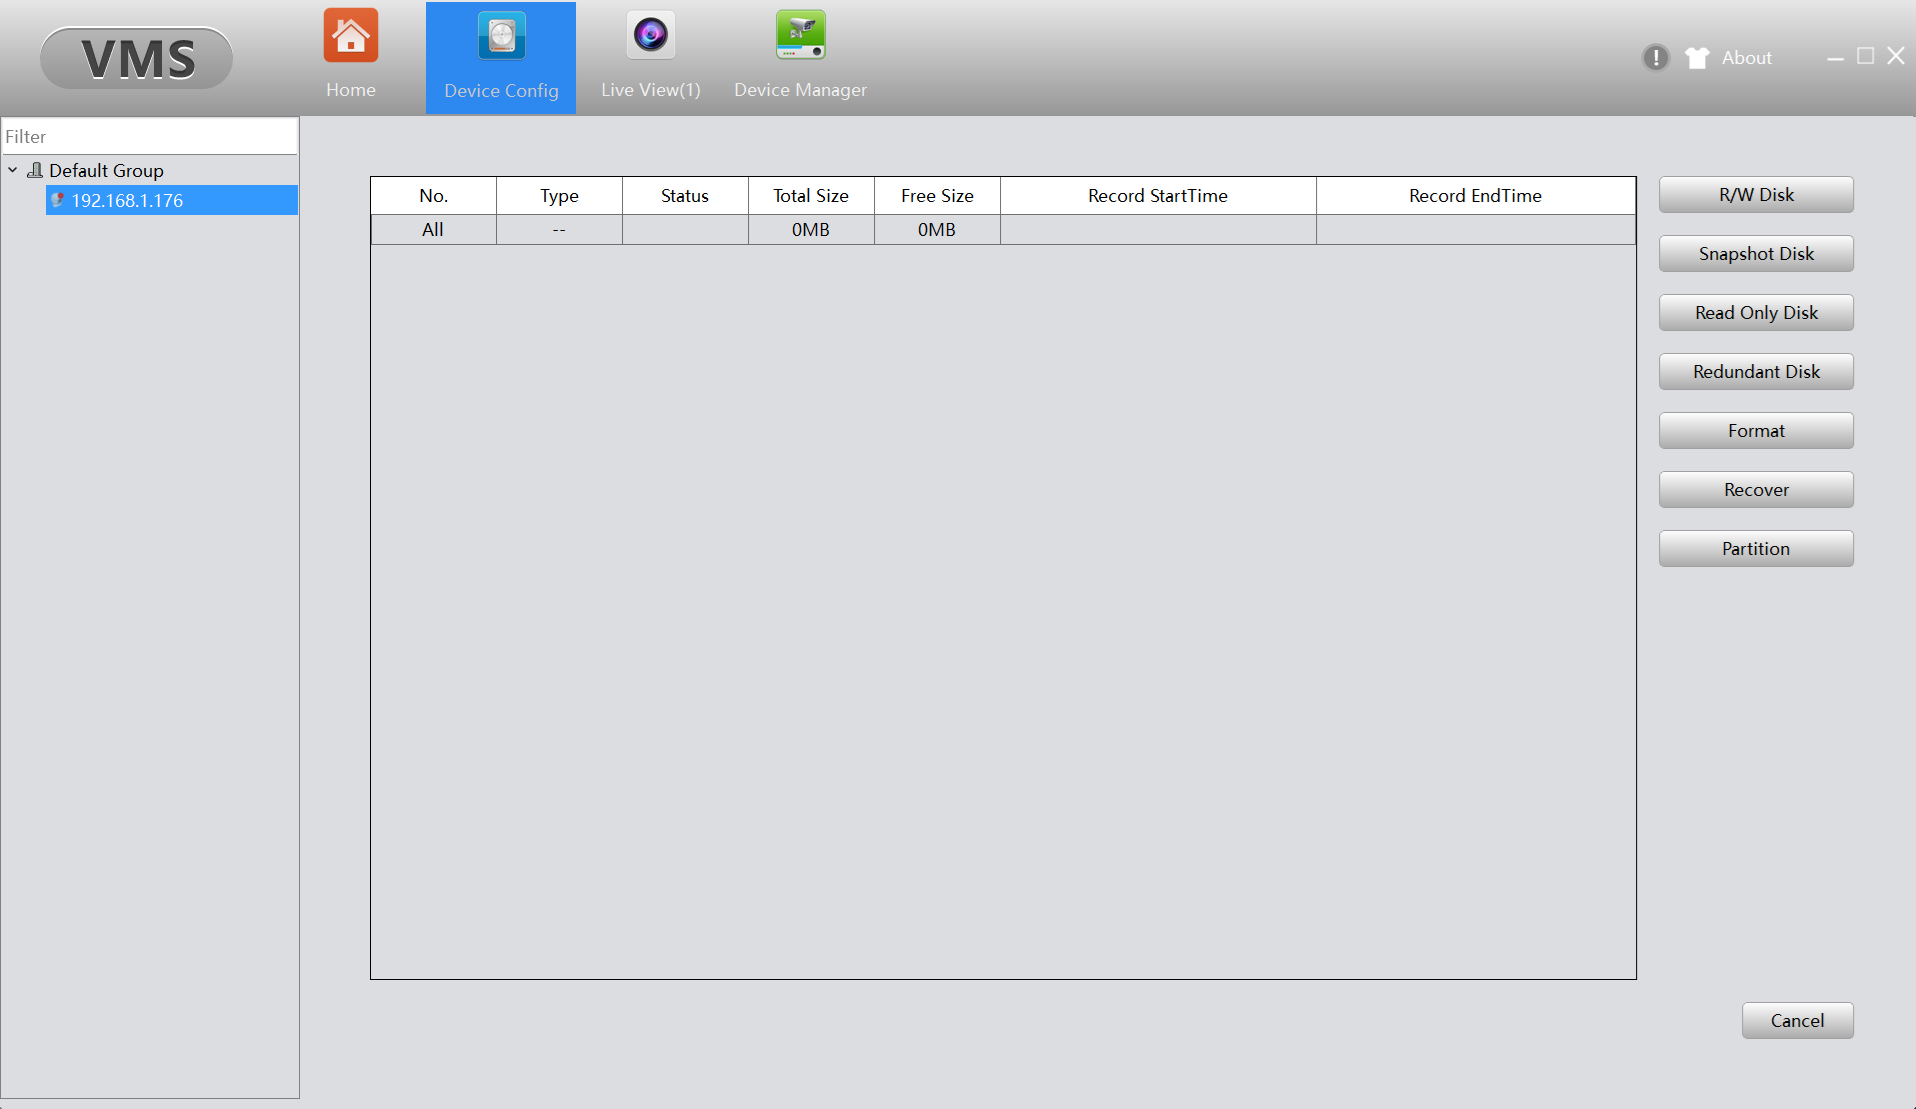
If this is the case, ensure the memory card is inserted correctly in to the camera, and then power the camera off and then on. You should see some information populate the card field, such as a total size larger than 0MB. If the card shows an ‘Error’ in the status, you can highlight the row and click ‘Format’ on the side to re-format the card to work in the camera. Note that the card gets formatted in a way that the CMS5 software can read, through the camera. If you remove the card and insert straight to your computer, it wont be able to be read and your computer will try and format the card before reading, which will remove all of the data.
Motion Recording
If your camera has a built in SD card reader, you can set up motion recording to capture events of interest, rather than sifting through hours of continuous footage. To enable this, navigate to ‘device config’, then select your camera on the left hand side.
Enter the ‘record config’ menu and ensure that there is a tick in the ‘detect’ box. You can also set a schedule in the time section for when you want recording events to occur. By default, its set as 00:00 to 23:59, which is 24 hours a day. Click ‘apply’ to update any settings changes.
- Go to the ‘Video Detect’ Menu and put a tick in the ‘Enable’ box.
- You can fine tune the motion settings here. The default settings are usually fairly good to get you going, but here is a quick overview of what some of the settings change:
- Sensitivity: How much ‘movement’ has to occur to trigger a motion event. The camera detects pixel changes, so light changes can trigger motion recording. A lower sensitivity means that a lot of the pixels on the screen have to change to cause an event, with a higher sensitivity picking up much smaller pixel changes.
- Period: Sets the time that motion should be active. It’s probably best practice to not use this setting, as you can change the overall schedule, covered in the *** section.
- Interval: Sets the time between when triggers can occur. If a 2 second interval is set, any movements would not be ignored within the two seconds after an initial trigger.
- Delay: Sets the ‘tail’ of the video. If just one event is triggered, the video will last for the length of the delay time. If multiple events occur within this delay time, the video will continue, until the last event trigger.
Enable Audio
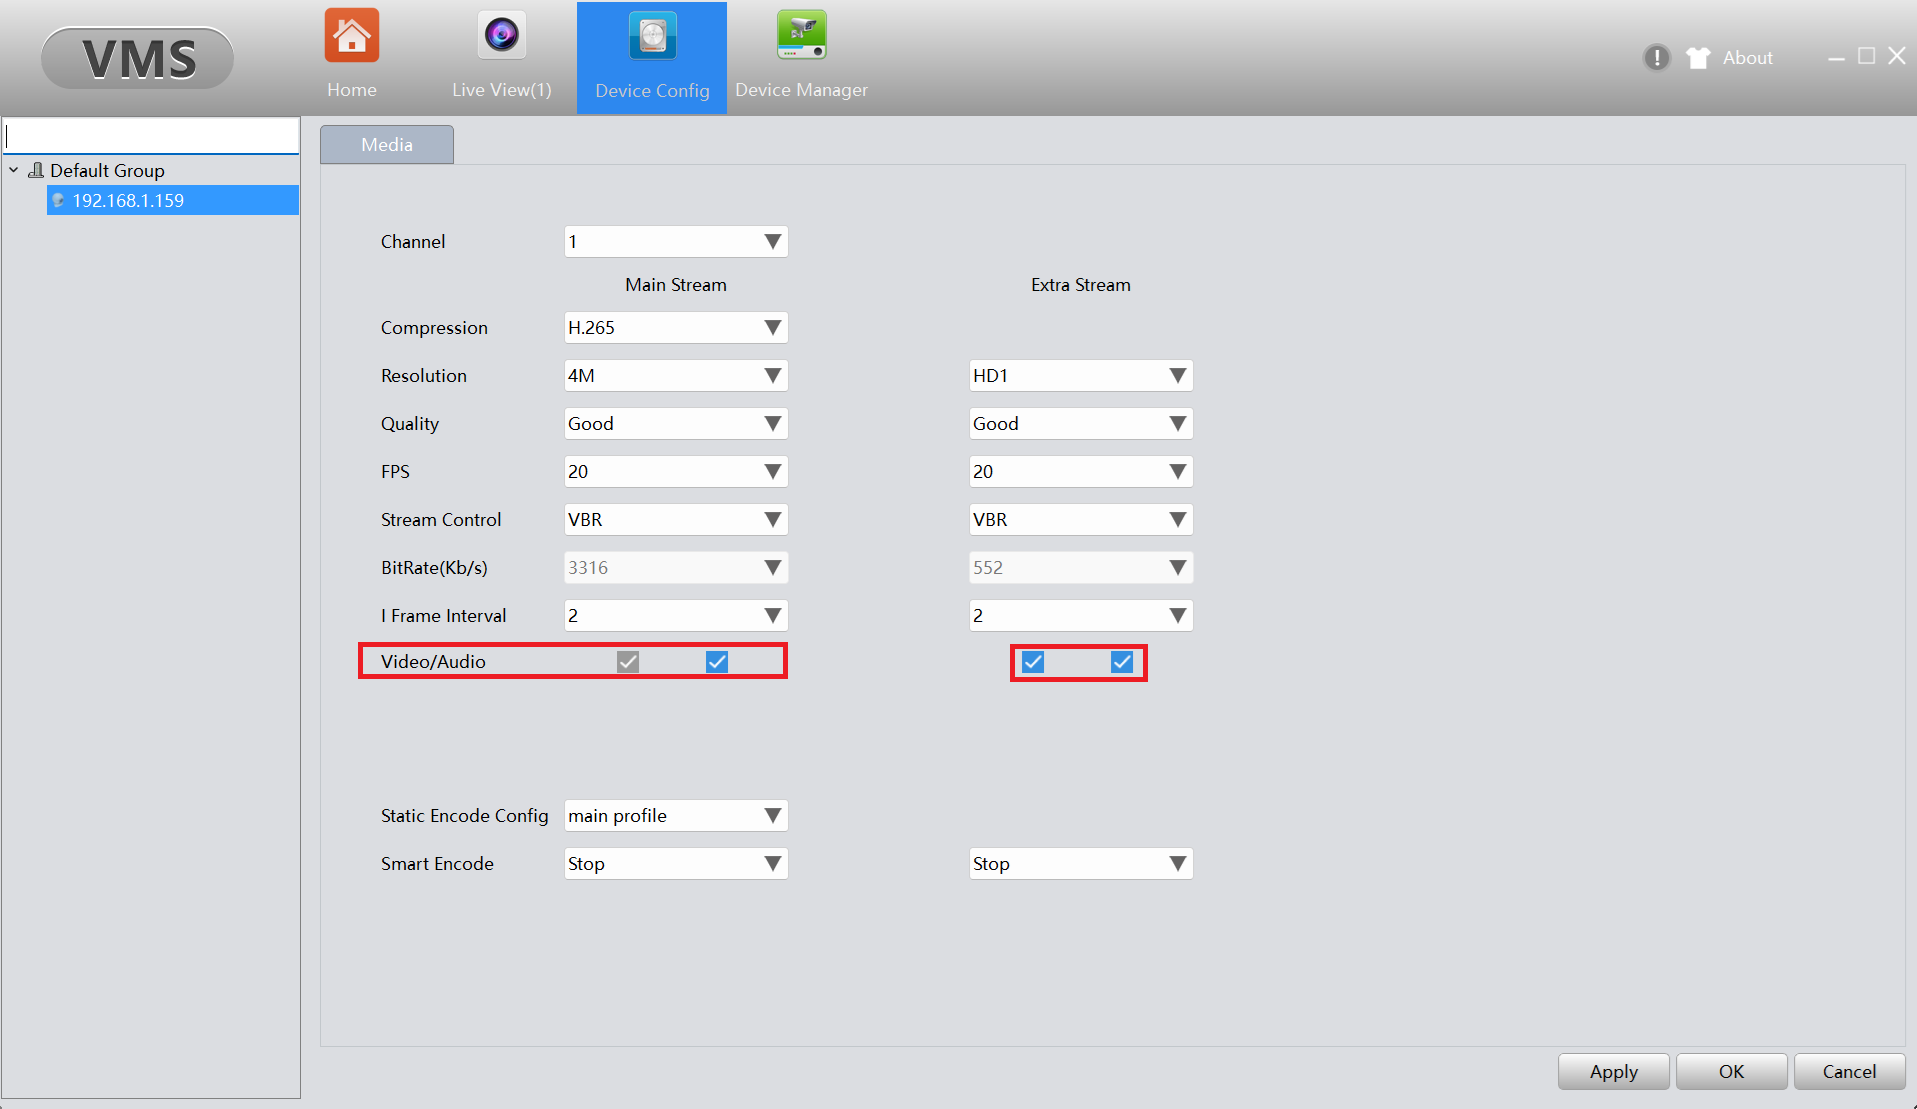
For cameras with a built-in microphone, or with an external microphone attached, you will have to enable audio for the camera. Now go to the encode option, you will see the mainstream Collom and extra stream Collom with four tick boxes at the bottom.
You will want all four of these boxes to be ticked and then press the apply and ok button.
On the live camera feed, you will see a speaker icon towards the top which you can click on to unmute the sound.
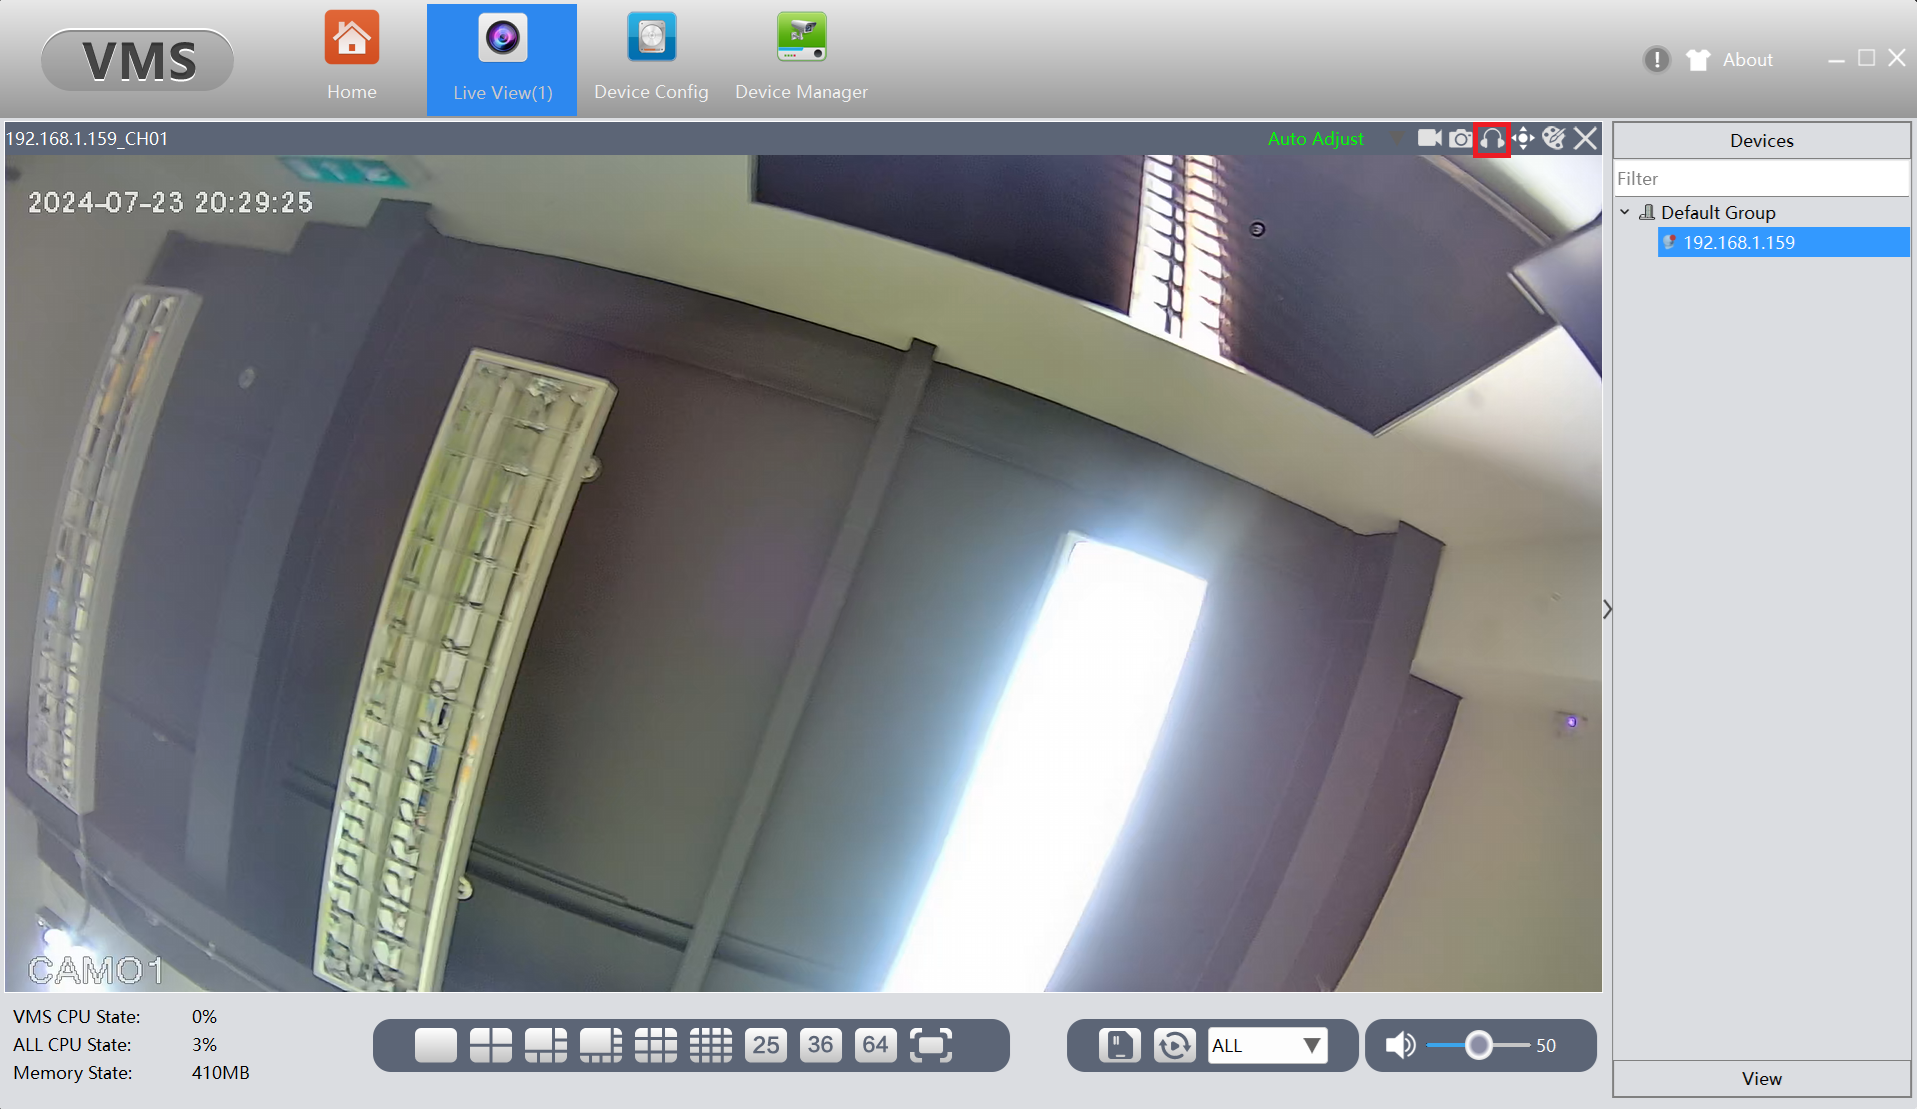
That’s everything set up, you will now be able to get audio on the live video feed from your camera.
Changing Camera Parameters
All of the cameras we sell will have preset parameters that will be suitable for most applications and usually won’t need to be amended. If you find that you need to change any settings, go to ‘device config’ and then ‘Camera Param’. Some of the settings are explained below:
- Day/Night mode – Set whether camera automatically switches between Day or Night mode with menu ‘DNAutoOper’
- ‘MultiColor’ is always in day mode – not utilising camera infrared light.
- ‘BlackWhite’ is always in night mode – always using infrared light, not visible light.
- Scene mode relates to how the camera behaves with artificial light. Indoor/Outdoor options.
- Slow Shutter – Slows down the shutter speed. Setting to ‘None’ decreases motion blur, but will allow less light in to the camera. A ‘strong’ slow shutter relates to a longer exposure.
- Wide Dynamic – Improves lightning dynamic range, but can trade off colour and can introduce noise in lower light conditions.
- IR_CUT – Keep this on auto switch. Auto switch uses the light conditions to set the camera to decide when to switch to night mode. Sync switch would rely on an external sensor to change the day/night mode, which your camera doesn’t have.
Set Camera Time
To keep an accurate log on when events have occurred, and to make searching for files easier, it’s best to keep the correct time set to the camera. Luckily, this is very simple to do. Navigate to the ‘Device Config’ window, and enter the ‘System Config’ menu.
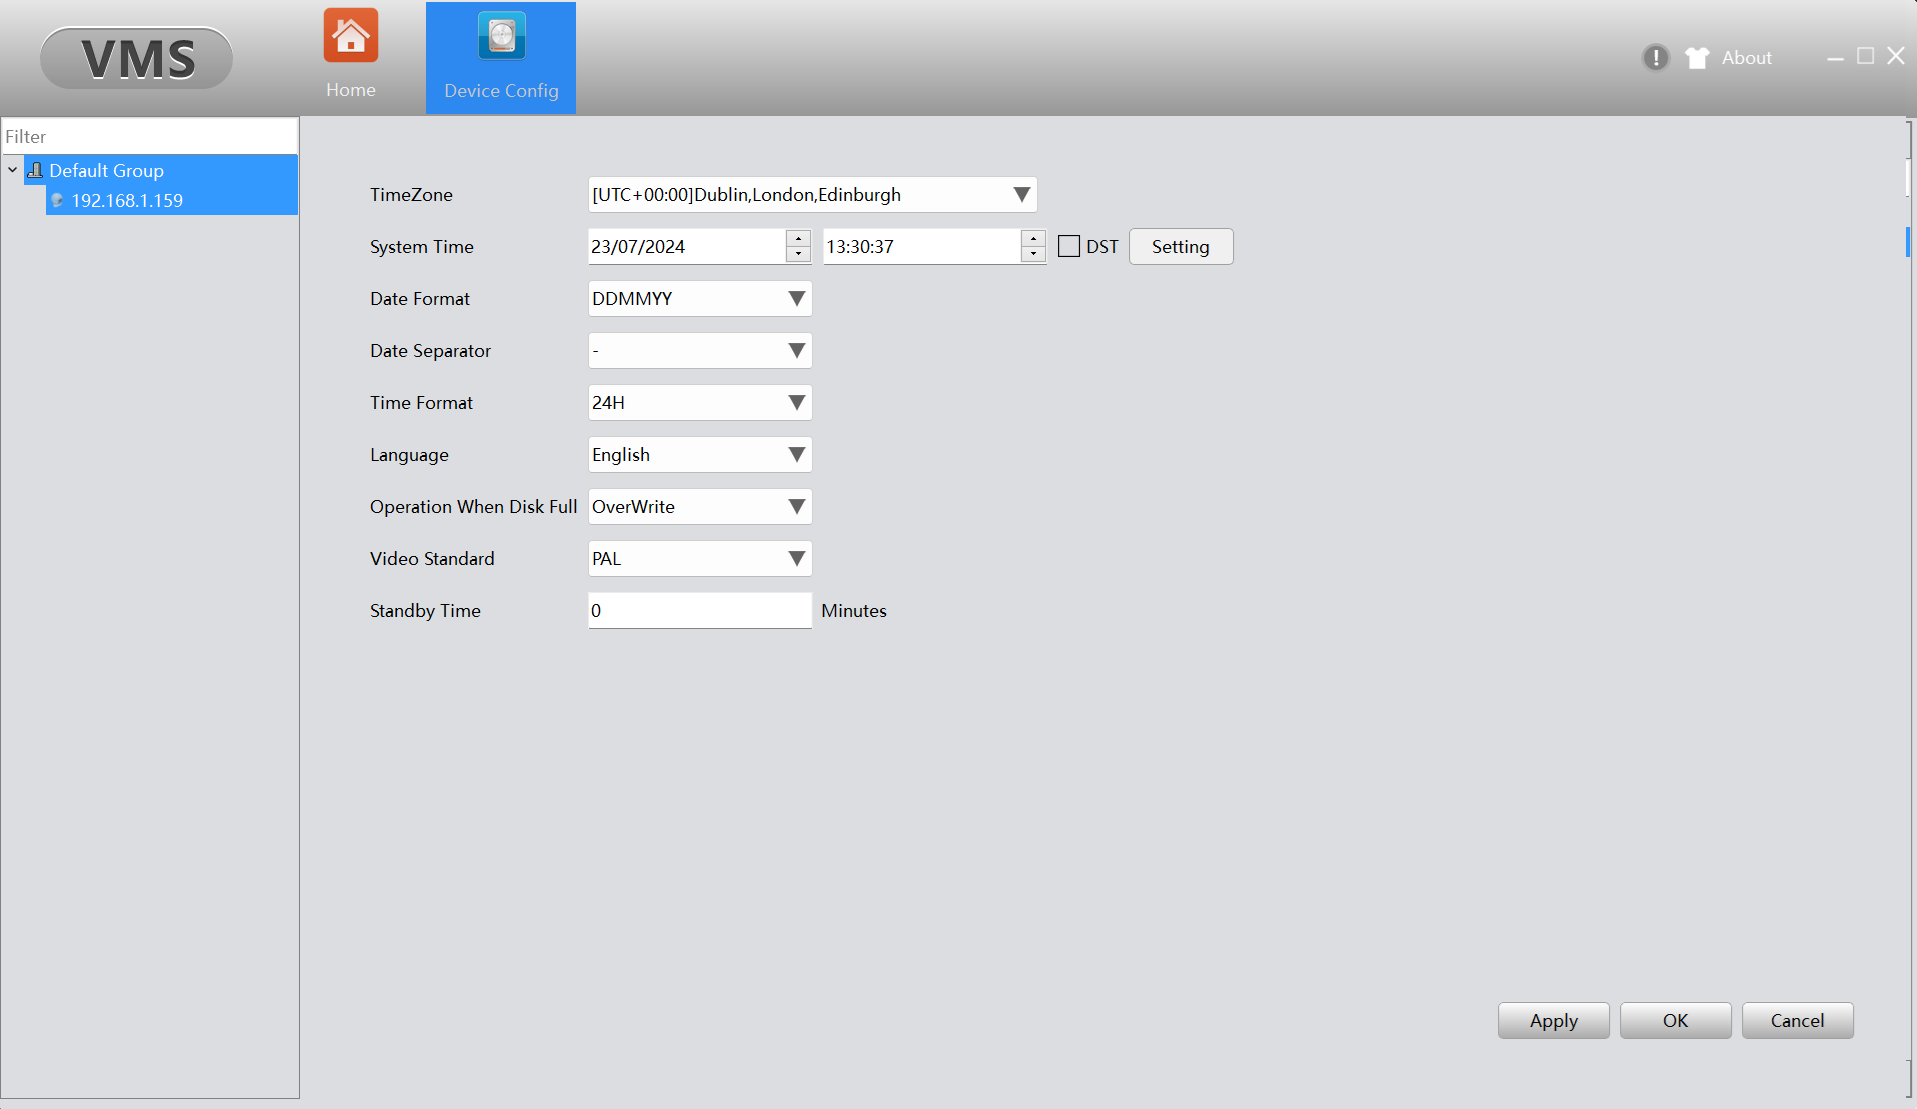
Enter the system time in this menu apply these settings.
Playback Footage
If you have a camera with a built-in SD card, the footage will need to be played back and downloaded through the ‘Playback’ menu in CMS5.
Select your camera from the right-hand side under the ‘Device’ menu.
Then set the parameters for the footage that you want to view. By default, the time parameters will be for today’s date, but you can modify this range, then click ‘search’.
The list of files and times will display on the bottom bar, as shown below.
Need more help?
If you need help with anything else please check out our other guides or get in contact.
