How to Manually Add an IP Camera to a Gamut DVR/NVR through a TVUpdated 5 days ago
Purpose of The Guide
This guide will show you how to manually add an IP camera to a DVR/NVR.
Before You Begin
Your Gamut device will need to be turned on and connected to your internet router. You will need to use a TV to set up the recorder for the first time and follow the quick start guide to do so. After the initial setup, a TV or monitor is not necessary when accessing the recorder via a network connection.
If you are using a recorder and cameras, make sure that the cameras are connected and working.
If you are using a Wi-Fi bridge system with your camera, make sure that the bridges are turned on, wired correctly, and communicating before you begin.
IP Camera
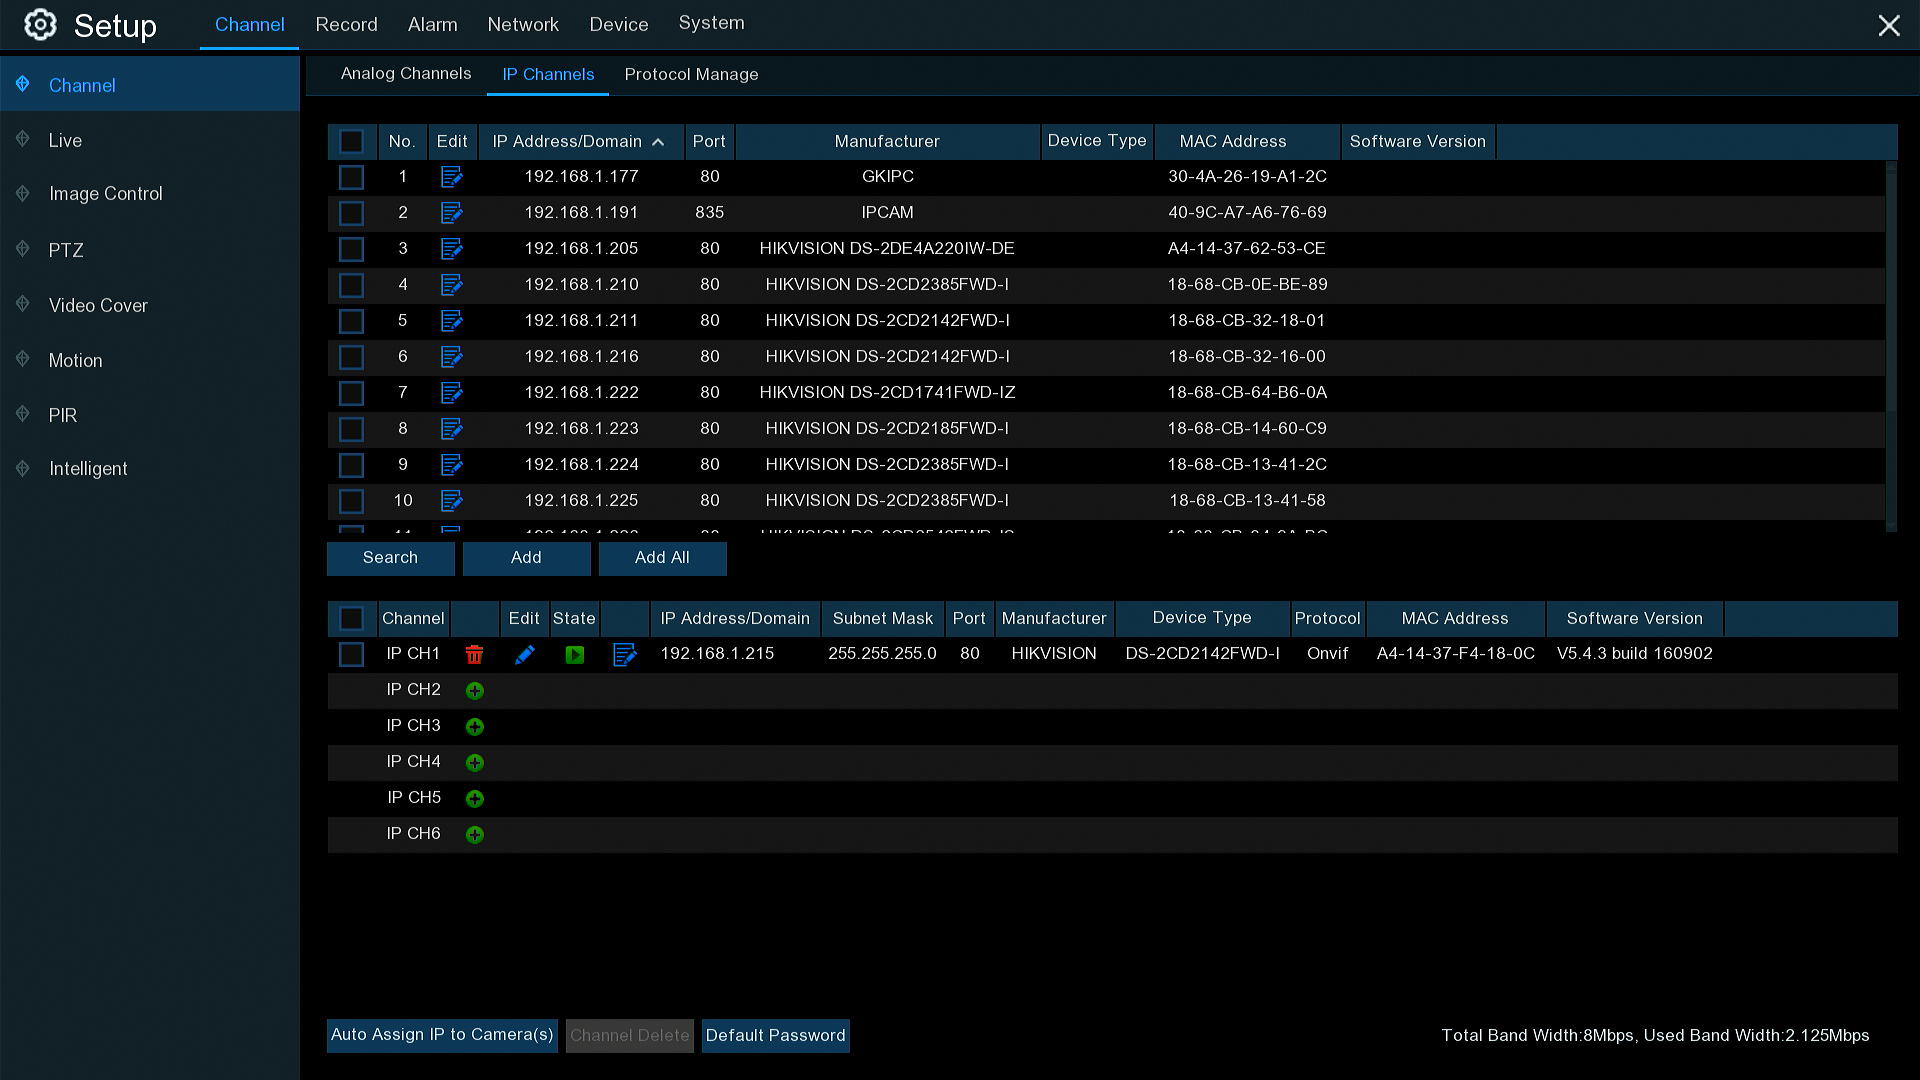
This menu allows you to add IP cameras to the NVR.

- Click Search to search IP cameras from the local network.
- Click Add to add an individual IP camera, and click Add All to add all IP cameras.
- Once you have clicked add If you know the camera's IP address, then you can manually input it in, if you search and can see the camera in the list, you can also select the camera, then you will just input the camera password and make sure the details are correct.
Click Search button to search IP cameras, and then click one of the IP cameras in the device list.
IP Address/Domain: The IP address or domain name of the IP camera
Alias: Name of the IP camera Position: Position to display the camera name on the screen.
Port: Port of the IP camera
Protocol: Choose the protocol of the IP camera from the dropdown menu (Normally Select ONVIF)
User Name: User Name of the IP camera
Password: Password of the IP camera
Bind channel: Choose a channel of the NVR you want to attach to
Auto Assign IP to Camera(s): The added IP camera would be not able to connect if its IP address is not in the same network segment with NVR. With this function to reassign an IP address to all added IP cameras.
Channel Delete: Choose one or more added IP cameras, and click this button to detele.
Need more help?
If you need help with anything else please check out our other guides or get in contact.