How To Export Footage from Gamut Surveillance Client Software (Windows/MAC)Updated 5 days ago
Purpose of The Guide
This guide will show you how to download recordings from your Gamut camera or recorder, using a Windows or Mac computer.
Before You Begin
Your Gamut device will need to be turned on and connected to your internet router. You will need to use a TV to set up the recorder for the first time and follow the quick start guide to do so. After the initial setup, a TV or monitor is not necessary when accessing the recorder via a network connection.
If you are using a recorder and cameras, make sure that the cameras are connected and working.
If you are using a Wi-Fi bridge system with your camera, make sure that the bridges are turned on, wired correctly, and communicating before you begin.
Let’s Get Started
You will need to make sure you have added your camera or NVR/DVR to the surveillance client, if you have not done this already then please follow the guide provided Here.
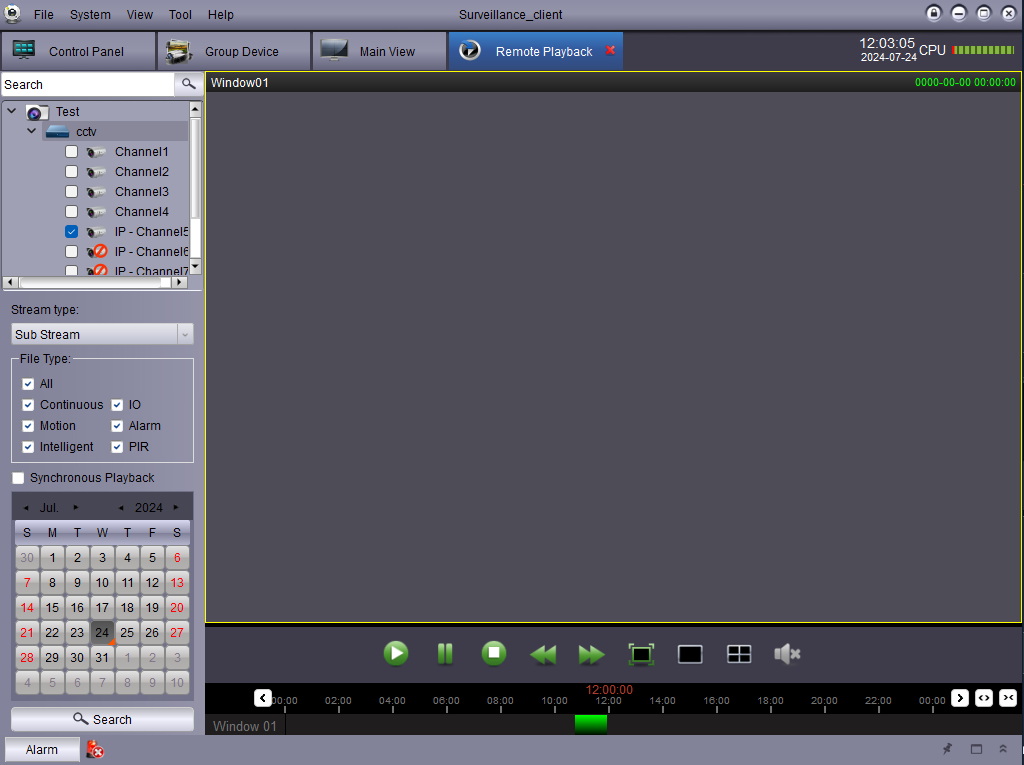
Once items have been added to Control panel, select remote playback.
Once you selected remote playback, your page should look like this.

Once you have selected the camera(s) and date that you want the footage from, run it through the playback to make sure it is the correct information.
If it is you can then right click on the footage window and select download, on this new window you can either download data in batches or click the "Download by Date" button at the top to specify dates/times, this is the method we prefer to use as you then get the exact footage you are after.
Once you have chosen the dates/times click the download button at the bottom. this will then proceed to download the footage from the recorder onto your computer in the location setup in the software.
If your files are not playing, please download the VLC player and play the files through there.
Need more help?
If you need help with anything else please check out our other guides or get in contact.