How to configure the Recording Schedule and Some Basic Setting in Surveillance client.Updated 6 months ago
Purpose of The Guide
This guide will show you how to access some of the settings and how to set up recording schedules and basic settings of the recorder.
Before You Begin
Your Gamut device will need to be turned on and connected to your internet router. You will need to use a TV to set up the recorder for the first time and follow the quick start guide to do so. After the initial setup, a TV or monitor is not necessary when accessing the recorder via a network connection.
If you are using a recorder and cameras, make sure that the cameras are connected and working.
If you are using a Wi-Fi bridge system with your camera, make sure that the bridges are turned on, wired correctly, and communicating before you begin.
You will need to also have the NVR/DVR added to the surveillance client.
The guide can be found Here
Let’s Get Started
To access the settings of the recorder/camera itself, go to the Control Panel, click on Group Device, then click on the spanner icon next to your recorder.
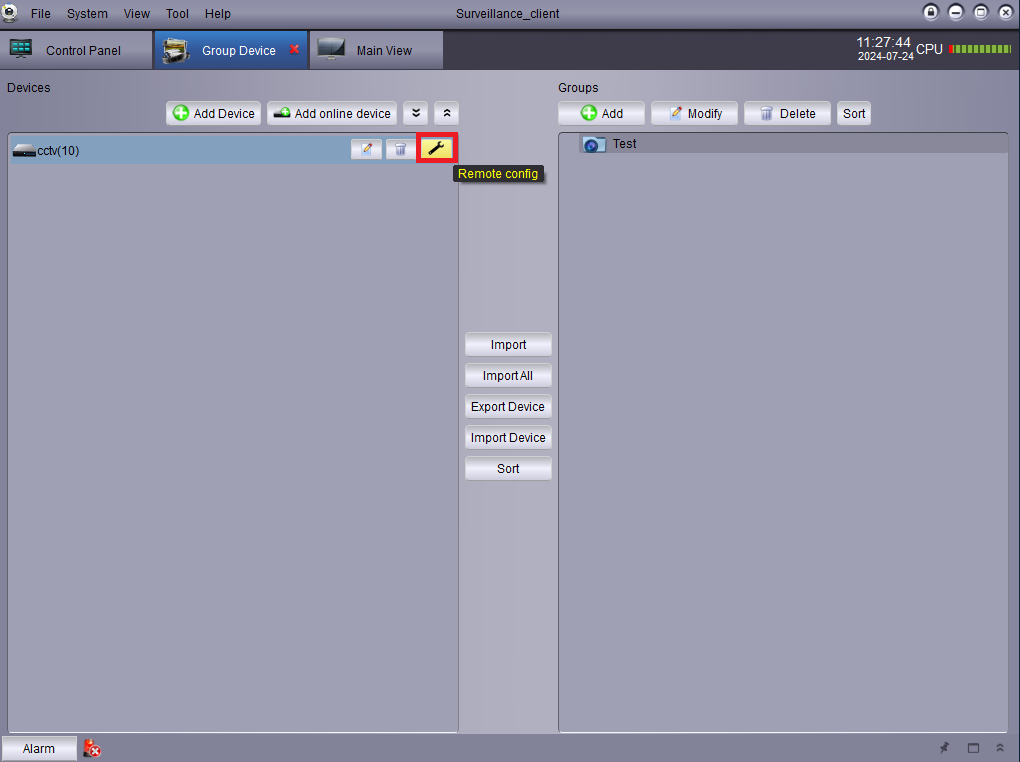
You will be able to find all of your settings within the panel above.
To schedule recording, click Record -> Schedule, you can either have motion and continuous record or just one of them. If you select the recording option you want to use and then click on the day and drag across the time period you want it to record.
This will then create a bar as you can see in the image below which you will want to do for each day.

Once you have set the recording schedule you need to click copy and then select all other channels on the recorder, if you want them to have the same schedule, if not you can change the channel from IP CH1 to IP CH2.
Masking Areas out in Motion Settings.
If you are getting false alarms and want to configure what parts of the image the camera is looking for motion in then please click on Display -> Motion Detection.
On here you can Clear the image of any boxes and then click/drag over where you would like the camera/recorder to focus on motion, any areas not marked should then not trigger recording/alerts.
Please make sure enable is ticked and you click save to save the settings.
Sensitive is the sensitivity of the motion detection, the lower the number the less likely it will be to trigger recording/alerts, you may find adjusting this will help.
Changing Resolution and FPS on cameras.
This can be found in Record - Main Stream.

Channel - Select which camera.
Resolution - Resolution of the camera.
FPS - Frames Per Seconds
Video Code Type - either H.246 or H.265.
Bit Rate - Useful Article
Date and Time.
System -> General, all date and time and NTP services can be found here.

Push Notifications On When Motion Is Triggered.
To change these settings go to Alarm -> Motion. If you want your recorder to beep when motion is detected you can turn the buzzer on.

If you have any alarm system like a PIR sensor that you have linked to the recorder then you want to enable this option.
Changing Password for Recorder.
System -> Users 
You can change your password here and also turn off the password function if you did not want to use a password.
If you forgot your password, then please follow this guide How to Reset Gamut Recorder Password
For more information on the settings of the recorder, please refer to the quick start guide or the manual.
Need more help?
If you need help with anything else please check out our other guides or get in contact.